This website uses cookies to ensure you get the best experience on our website. Learn more
Rigging Your Outriggers
Click here to find our Instruction Manuals for rigging your outriggers.
Step-by-Step Video Instructions for How to Rig Outriggers
Rigging 20' or 24' Carbon Fiber Tele-Outriggers
- Start at the tip, like Captain Mark did in the video. Chase the halyard line all the way down like stated in the video.
- Just insert the line through the Line Caddy with the roller,
- Following the same path for all three halyard lines
- Ultimately, there will be four sets of rollers for the halyards.
- The first, longest halyard, will chase through all four, starting at the tip and going through the roller Line Caddy.
- The second longest halyard will chase from the second swivel collar, back through the center roller of the Line Caddy, going through three sets of rollers
- The shortest halyard will chase from the first swivel collar, back through the roller of the Line Caddy that is closest to the bow when the poles are rotated to fishing position
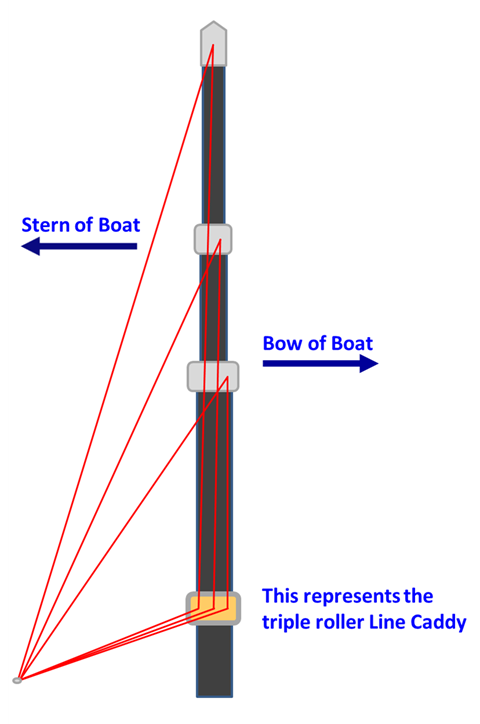
- When putting the halyard lines through the rollers for these, make sure to “wrap” the roller. Go between the opening created by the “hoods” on the swivel collars.
- Simply put, make sure the halyard line goes from the top of the roller, directly around to the bottom side of the roller. Do not put it on the outside of the “hood” area.
Basic Rigging Layout
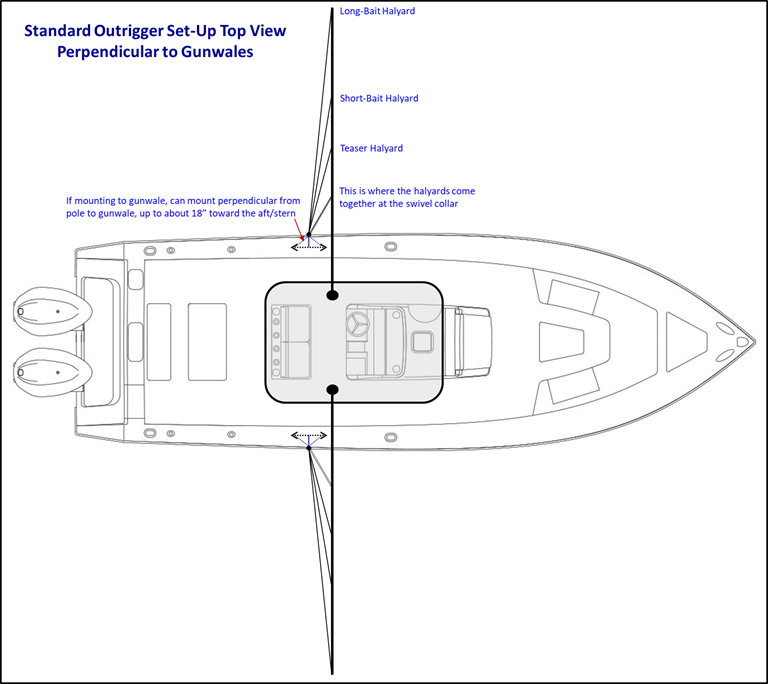
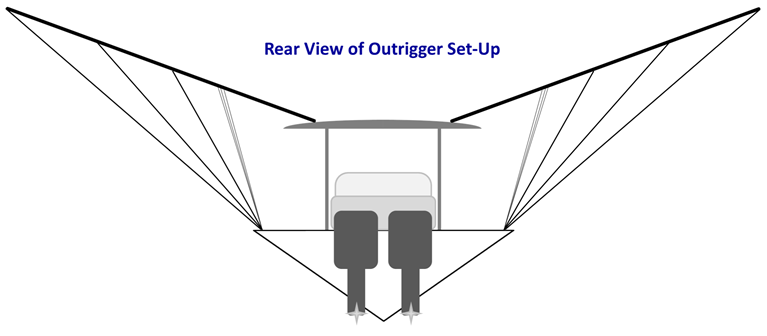
TACO Handy Tips: The pad eyes that the bungee hooks to on the gunwale is usually installed about 6"-12" toward the stern between the outrigger and the rod holder. On hardtops the pad eye is installed on the outer edge between the outrigger and the rod holder. On soft tops the pad eyes are not needed, just pass the bungee cord swivel snap through the canvas lacing and snap it back on itself.
